LIFE ON CONTENTED - PART TWO
Over the years we have made Contented our own home. She is no doubt completely different from when we were handed the keys. We have learnt that where there is a will there is a way and with a bit of forethought you can achieve anything.
Unlike houses it is relatively easy to change the layout. Bulkheads can be removed, re-instated where you want them. Obviously, some boats have amazing woodwork and to touch it would be sacrilege, but we found investing in an ex-hireboat the world is your lobster, so much scope.
In the beginning we replaced the ceiling in the galley/saloon with spray foam insulation and boarding. Thought about doing the same for the rest of the boat, but the mess it would make was not appealing especially as we spend most of our time on her, so we borrowed an idea from another boater.
Inside cars the roof is covered with headroom lining, acts as insulation against heat/noise and comes in various soft stretchy colours. It’s applied by using hi stick spray adhesive. Rather than tackle the ceiling as our 1st attempt, we practiced on the walls which would end up being our utility room. Measure (twice, cut once!!), spray adhesive onto the wall, leave for a couple of minutes to go tacky, apply lining, trim, et voila!!!!
The beauty of this material its 4- way stretch which is a real bonus if you didn’t take heed of my 1st instruction ☹. To make the corners nice and neat, instead of wooden beading we attached thick rope used for making fenders. Gave it a bit more of a boaty look. It was now time to tackle the ceilings…. a word of advice, it takes two. Also, when spraying the adhesive, have a piece of card to hand to protect surfaces, it goes a bit like silly string if you’re not careful and a straight edge to flatten out any air pockets. Reattach the battens, pelmets and I have to say we were very chuffed with the look.
So, word of advice for any boaters, if you’re ceilings do not need to come down and you want them to have a new look very cheaply then this is definitely the way to go. I think we got a bit carried away though…. the internal stern doors are now covered, a couple of the cupboards and wooden gap fillers above the wardrobes, just as well our dog Lulu didn’t stay still for too long!!!!!
I had spoken previously about keeping the ‘poo’ tank insitu for 2 reasons: - not wanting to cut it out and we were keeping the pump out toilet in that bathroom. As with all boats you look to maximise space for storage, any nook or cranny becomes a possibility. On Contented we had 2 pump out toilets which is quite handy in certain circumstances, I’ll let your imagination decide what I mean, but for us it was a luxury being the only 2 on board. I decided that ‘we’ would convert it to a double wardrobe. Getting the toilet out was interesting. Drained as much of the water from the bowl, isolated the power, disconnected the electrics, and very very carefully carried the toilet including the plumbing, out of the boat taking great care not to spill any of the contents, even my husband was impressed. Mounted a hanging rail, bought an ottoman and a double wardrobe was born 😊.
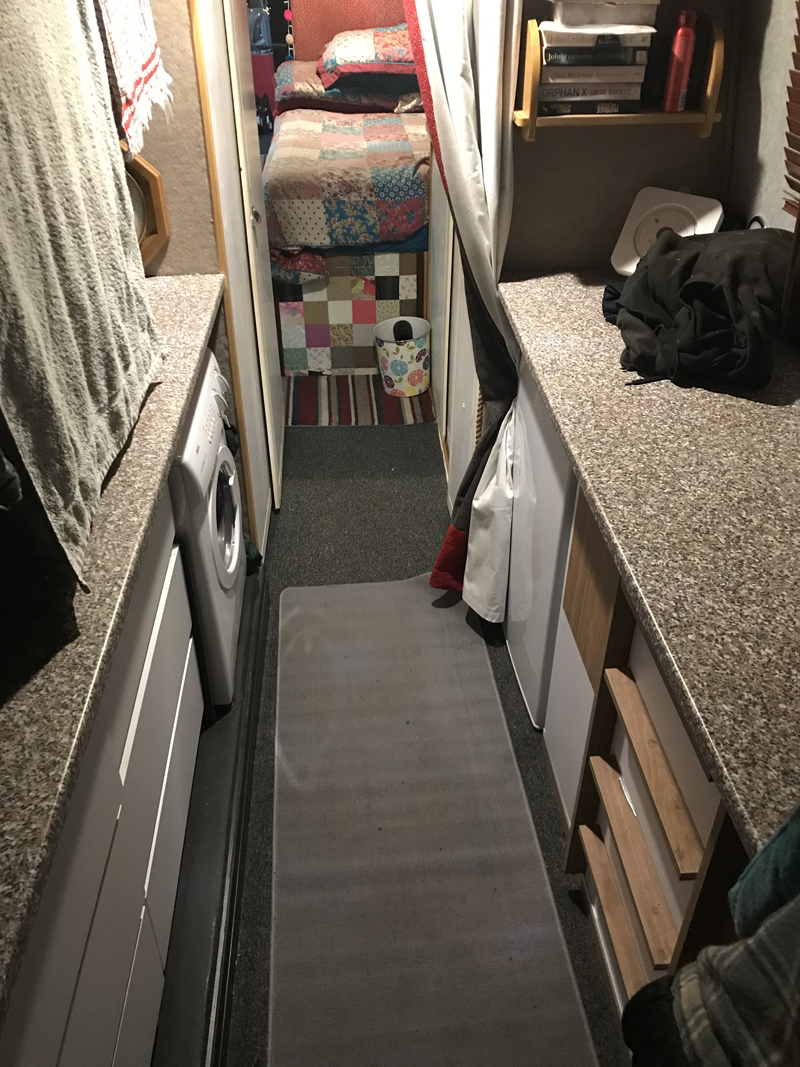
The next job was to remove the waste tank situated in the twin bedroom to accommodate utility area and storage ☹. Finally plucking up courage to begin this work we pumped out the tank, refilled with water, pumped out again in the hope there wouldn’t be too much residue to remove once the tank top had been cut out. Donning face masks, vapour rub under our noses, heavy duty gloves, old clothes, wellies, scrapers, and bags we went about removing the final remnants of 17 years of waste. Not the most pleasant of jobs, but needs must. Once emptied, scrubbed clean, bleached then the rest of the tank was able to be cut out, ready for 2 sets chest of drawers, washing machine installed and work surface over it.
Job done……